HOW TO PAINT KITCHEN CABINETS
When it comes to painting kitchen cabinets, we know there are questions: How do I clean cabinets before painting? What paint should I use? What does it cost? Relax: repainting cabinets doesn’t have to be intimidating.
Watch our how to video for a look at our recommended process for repainting kitchen cabinets, or keep reading for our helpful step-by-step guide!
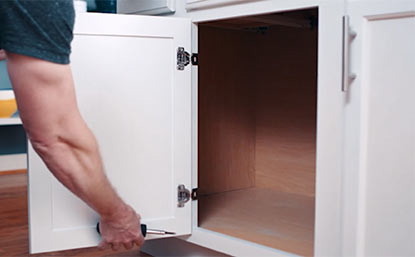
Step 1: Flat Surfaces and Space to Dry
A flat painting surface is the key to refinishing kitchen cabinets. Remove all draws and doors, and don’t forget to remove any hardware. Then find an area that gives you enough room to work—and enough space to let everything dry for extended periods of time.
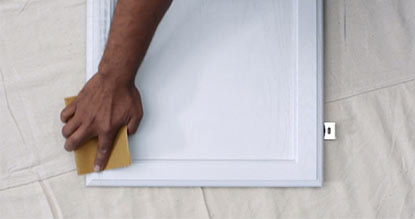
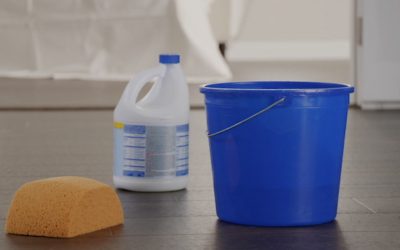
Step 2: Prep! Prep! Prep!
The first rule of cabinet repainting: Make sure the cabinets and doors are clean and dry. Use a gentle grease remover and a damp sponge to wipe them clean, and let everything dry thoroughly. After cleaning, it’s time to roughen things up! Most cabinet finishes are too smooth or glossy to reprime and repaint, so using a medium sandpaper (we like 100- to 150-grit), sand down your surfaces a little—not enough to sand away the current finish entirely, but enough to give the primer a little more grit to stick to. Wipe away any dust with a slightly damp cloth, then let dry.

Step 3: Protect Your Surroundings
Step 4: Ready to Prime
When it’s time to prime cabinets before painting, knowing your surface can go a long way. If you’re painting wood cabinets, our ADVANCE Primer (790) has great adhesion that provides the proper foundation for any ADVANCE finish. Plus, it can be sanded and levels well, ensuring a smooth finish and helping to mask minor imperfections.
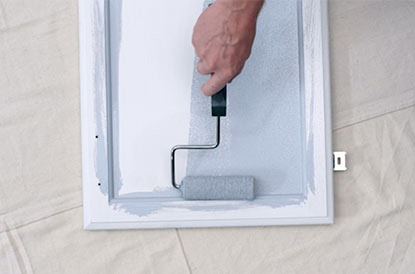
If you’re painting laminate cabinets, our Fresh Start® High-Hiding All Purpose Primer (046) is the choice of professionals. Do not use lacquer-based primers, as they can impede how ADVANCE adheres to the surface of the cabinets.
After you’re done, take a break: the primer must dry at least 24 hours before moving on to Step 5.
Side note: Painting cabinet doors a darker color? Use a tinted primer as your base.
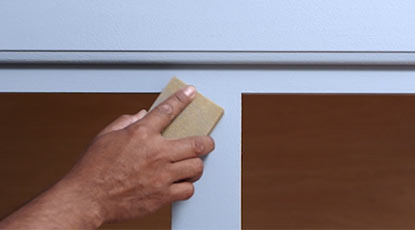
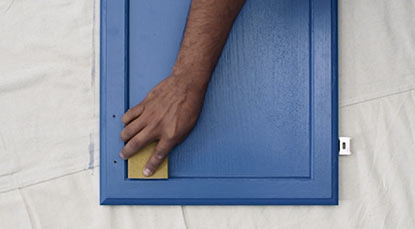
Step 5: Sand Again
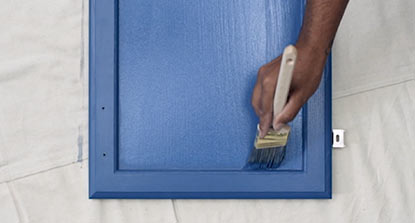
Step 6: Time to Paint!
Using a premium Benjamin Moore nylon/polyester brush, apply the first coat of ADVANCE paint.
Time-saving tip: Painting cabinet doors (and similar large areas) may go faster if you use a foam or microfiber paint roller instead of a brush. Like with primer, let your first coat of paint dry completely before moving on.

Step 7: REPEAT STEP 5
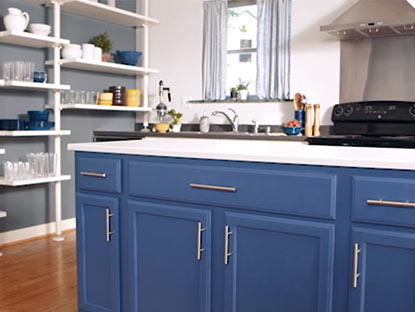
Step 8: REPEAT STEP 6
A second coat of ADVANCE gives you complete coverage and allows the finish to cure evenly. We love the look of Blueberry Hill 812 and the pop of color it brings to formerly white cabinets.
Step 9: Let It Dry!
Similar posts

HOW TO PAINT INDOOR FURNITURE
Painting your furniture can breathe new life into a room at a fraction of the cost of buying new furniture. With the right preparation, high quality paint and the just-right paint colors, a makeover of your favorite piece is within reach.

HOW TO PAINT A CEILING
Painting your ceiling can seem like a tough task. But following expert ceiling painting tips and using Benjamin Moore® Waterborne Ceiling Paint can help you get the job done right.
HOW TO PREPARE WALLS FOR PAINTING
When it comes to ensuring that your paint project is a success, there is no more important place to start than room preparation, including cleaning, sanding and priming walls before painting.