HOW TO PAINT A CEILING
Painting your ceiling can seem like a tough task. But following expert ceiling painting tips and using Benjamin Moore® Waterborne Ceiling Paint can help you get the job done right.
While classic white ceiling paint is a go-to for homeowners, why not consider color? A rich navy blue or deep black ceiling can blur the boundaries of a room, making it look endless yet intimate. Painting a ceiling with a lighter shade or a slight variation of your wall color delivers depth and dimension, without breaking the unity of existing color schemes.
The Best Way to Paint a Ceiling
What’s the best way to paint a ceiling? Watch our how-to video for step-by-step guidance on how to paint a ceiling the right way–and get amazing results you’ll love.
Step #1: Prepare with the Right Paint & Tools
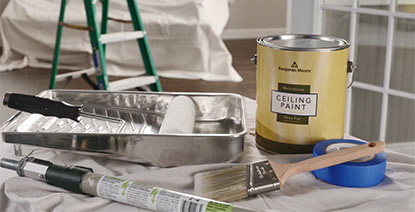
To get started, you will need a 2½-inch angle sash brush, painters tape, a nine-inch roller, sleeve and pan, an extension pole, a step ladder and Benjamin Moore Waterborne Ceiling Paint.
In addition to your paint, make sure your brush and roller sleeve are high quality and that your roller sleeve is the appropriate nap for your ceiling texture. When it comes to the best type of paint for ceilings, Benjamin Moore’s Waterborne Ceiling Paint is a “dead flat” paint that applies smoothly, hides most ceiling imperfections and is specially formulated to minimize both lap marks and splatter.
White is a common choice, but you can choose virtually any color to paint your ceiling, as Benjamin Moore offers thousands and can match the shade you desire.
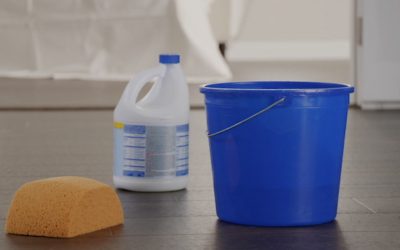
Step #2: Get the Space Ready
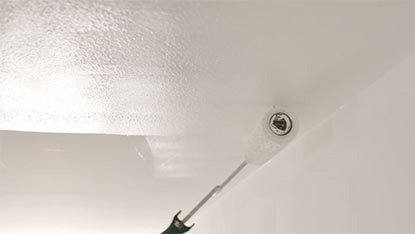
A common question is: “What should I paint first, the ceiling or walls?” Always paint the ceiling before the walls, and always cover everything below the ceiling with drop cloths. Try to empty the room completely to make the job easier. Also, try to remove overhead light fixtures. If you cannot remove fixtures, use painters tape to protect them from spatter or use your brush to cut around them carefully.

Step #3: Prepare Walls & Ceilings with Paint
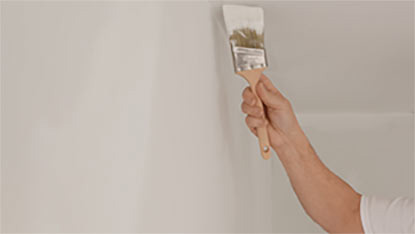
Start with painting the edge of the ceiling where it meets the wall first. Cut the ceiling in like you would cut in a corner. Starting in the ceiling line, brush into the corner and feather paint 2-3 inches and down onto the wall. If you aren’t going to paint the walls, use painters tape to protect the wall or use the brush to cut in a nice straight line along the wall’s edge.
Switch from brush to roller to start painting the rest of the ceiling. Start from the corner of the ceiling and start rolling nearest to a window, so that you can see the light from the window reflecting the wet paint. Then work your way across the room, rolling slowly when you’re near the wall to help avoid hitting it.
Step #4: Keep Your Roller Loaded
Each time you load your roller, start on an unpainted area and work back into a painted area. Paint the ceiling in one session, so the paint dries uniformly. Wait for the coat to dry to determine if a second coat is needed. Check the label instructions for dry times.
Your ceiling is refreshed and ready to fit in with the rest of your home’s interior design.
Similar posts

HOW TO PAINT INDOOR FURNITURE
Painting your furniture can breathe new life into a room at a fraction of the cost of buying new furniture. With the right preparation, high quality paint and the just-right paint colors, a makeover of your favorite piece is within reach.

HOW TO PAINT KITCHEN CABINETS
When it comes to painting kitchen cabinets, we know there are questions: How do I clean cabinets before painting? What paint should I use? What does it cost? Relax: repainting cabinets doesn’t have to be intimidating.
HOW TO PREPARE WALLS FOR PAINTING
When it comes to ensuring that your paint project is a success, there is no more important place to start than room preparation, including cleaning, sanding and priming walls before painting.